我的英文和理解力都超低,所以我覺得學git 好難哦!看半天都懂不懂 Q_Q;我還是努力地研究一下,我預計,這些暫時學到的東西,過三天應該就會都忘光光了!所以特地寫一篇筆記,幫助下次能快點回神。
故事開始於有一天我 fork(分支) 了別人 github 上的project,但 fork 出來之後更新就中斷了,我改我的,別人改別人的。我 fork 的 project:
https://github.com/haiwen/seadroid
我在自己fork的project 修改了一些地方,原作者則是改了「很多地方」,要 merge 是大工程!! 但是神奇的 git 居然一行指令就搞定,真的很酷。
下面的文章,我看了,但不知道為什麼有人是用 git merge, 有人是 git pull –rebase upstream master,我覺得太難懂了,就略過,假裝沒看到,先挑一個試試看。
依照這篇文章最下面附的相關文章,我先用下面這個命令來加入遠端的 repository,在這邊的情境也就是比較新的、上游的 repository
git remote add upstream https://github.com/haiwen/seadroid.git
下完後,沒有任何反應,但是用 git remote -v 可以看到剛才加入的 upstream
附註:upstream 是 remote name、可以自己取名,不要重複就好,這次是用 upstream 做示範.
接著下:
git fetch upstream
回的結果:
- remote: Counting objects: 132, done.
- remote: Compressing objects: 100% (10/10), done.
- remote: Total 132 (delta 62), reused 62 (delta 62), pack-reused 57
- Receiving objects: 100% (132/132), 29.86 KiB | 0 bytes/s, done.
- Resolving deltas: 100% (63/63), completed with 29 local objects.
- From https://github.com/haiwen/seadroid
- * [new branch] contacts -> upstream/contacts
- * [new branch] dev2 -> upstream/dev2
- * [new branch] develop -> upstream/develop
- * [new branch] feature/document_provider -> upstream/feature/document_provider
- * [new branch] feature/support_client_side_encryption2 -> upstream/feature/support_client_side_encryption2
- * [new branch] fix_photo_gallery_crash -> upstream/fix_photo_gallery_crash
- * [new branch] hb -> upstream/hb
- * [new branch] horizon_base -> upstream/horizon_base
- * [new branch] master -> upstream/master
- * [new branch] maven -> upstream/maven
- * [new branch] mxh_seafile -> upstream/mxh_seafile
- * [new branch] titatium_backup -> upstream/titatium_backup
再下指令:
git checkout master
說明:因為要更新的 branch 是 master,所以我就先切到 master branch.
再下合併指令:
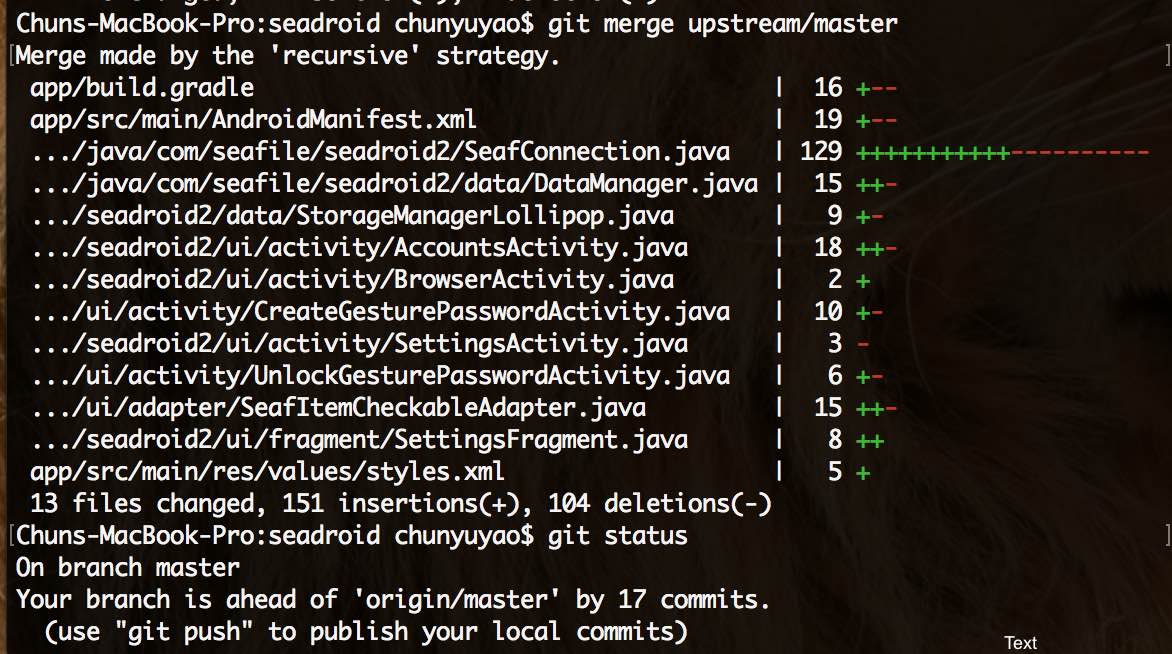
git merge upstream/master
回傳結果:
Merge made by the ‘recursive’ strategy.
app/build.gradle | 16 +–
app/src/main/AndroidManifest.xml | 19 +–
…/java/com/seafile/seadroid2/SeafConnection.java | 129 +++++++++++———-
…/java/com/seafile/seadroid2/data/DataManager.java | 15 ++-
…/seadroid2/data/StorageManagerLollipop.java | 9 +-
…/seadroid2/ui/activity/AccountsActivity.java | 18 ++-
…/seadroid2/ui/activity/BrowserActivity.java | 2 +
…/ui/activity/CreateGesturePasswordActivity.java | 10 +-
…/seadroid2/ui/activity/SettingsActivity.java | 3 –
…/ui/activity/UnlockGesturePasswordActivity.java | 6 +-
…/ui/adapter/SeafItemCheckableAdapter.java | 15 ++-
…/seadroid2/ui/fragment/SettingsFragment.java | 8 ++
app/src/main/res/values/styles.xml | 5 +
13 files changed, 151 insertions(+), 104 deletions(-)
執行的結果的截圖:
附註:在下這個指令時,會進入 vi 的執行畫面,要求我打一些字,幫這次的 merge 留下一些註解,我就輸入 update from original,然後按 ESC , :wq.
這個 merge 是 local 的 merge 還需要使用 push 才會推到 github server 上。
最後一個指令:
git push
回傳結果:
Counting objects: 143, done.
Delta compression using up to 4 threads.
Compressing objects: 100% (63/63), done.
Writing objects: 100% (143/143), 14.78 KiB | 0 bytes/s, done.
Total 143 (delta 78), reused 116 (delta 53)
remote: Resolving deltas: 100% (78/78), completed with 26 local objects.
To https://github.com/max32002/seadroid.git
21fe5b3..ff45589 master -> master
完全不下指令,在github 上操作的「懶人解法」,我覺得反而比較難,因為都馬看不懂 Q_Q;
To update a fork directly from GitHub. This still works, BUT it will lead to a dirty commit history.
- Open your fork on GitHub.
- Click on Pull Requests.
- Click on New Pull Request. By default, GitHub will compare the original with your fork, and there shouldn’t be anything to compare if you didn’t make any changes.
- Click switching the base if you see that link. Otherwise, manually set the base fork drop down to your fork, and the head fork to the upstream. Now GitHub will compare your fork with the original, and you should see all the latest changes.

- Create pull request and assign a predictable name to your pull request (e.g.,
Update from original). - Scroll down to Merge pull request, but don’t click anything yet.
Now you have three options, but each will lead to a less-than-clean commit history.
- The default will create an ugly merge commit.
- If you click the dropdown and choose “Squash and merge”, all intervening commits will be squashed into one. This is most often something you don’t want.
- If you click Rebase and merge, all commits will be made “with” you, the original PRs will link to your PR, and GitHub will display
This branch is X commits ahead, Y commits behind <original fork>.
So yes, you can keep your repo updated with its upstream using the GitHub web UI, but doing so will sully your commit history. Stick to the command line instead – it’s easy.
相關文章:
如何同步 Github fork 出来的分支
http://jinlong.github.io/2015/10/12/syncing-a-fork/
更新從 GitHub 上 fork 出來的 repository
(或是同步兩個不同 server 端的 repository)
https://www.peterdavehello.org/2014/02/update_forked_repository/
How do I update a GitHub forked repository?
http://stackoverflow.com/questions/7244321/how-do-i-update-a-github-forked-repository
連猴子都能懂的Git入門指南
https://backlogtool.com/git-guide/tw/
OH My God, 連猴子都比我厲害。
在同步完成之後,下指令,來一個新的 branch:
git branch new_branch
切換到新 brnach ,checkout 滿神奇的,除了切換 remote branch 也可以切換 local branch:
git checkout new_branch
把新的 brnach 推到 server 上:
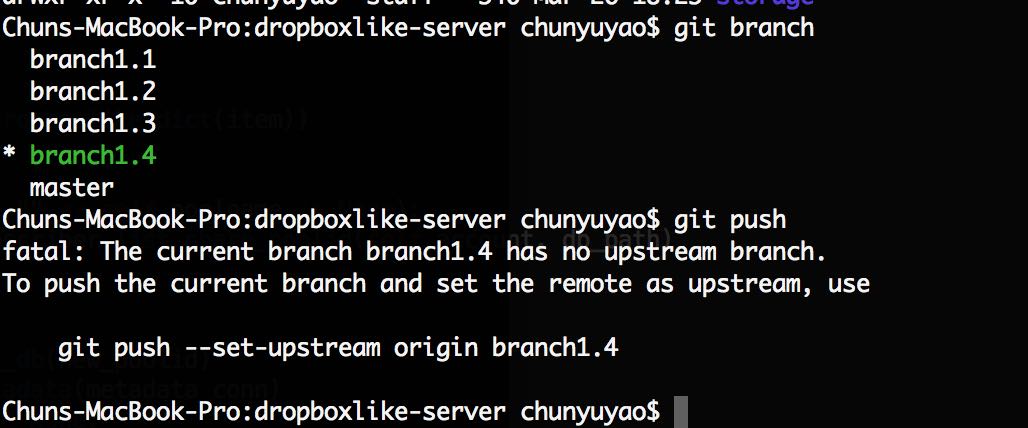
git push
上面是錯誤的,貼心的 git 說要下這一段指令才行:
git push --set-upstream origin new_branch
如果上面這段指令不行,請改下這行:
git push origin new_branch
說明:最後一行說,之後push 會幫我們放到 remote 的 dev branch.
How do you create a remote Git branch?
https://stackoverflow.com/questions/1519006/how-do-you-create-a-remote-git-branch
First, you create your branch locally:
git checkout -b <branch-name> # Create a new branch and check it out
The remote branch is automatically created when you push it to the remote server. So when you feel ready for it, you can just do:
git push <remote-name> <branch-name>
Where <remote-name> is typically origin, the name which git gives to the remote you cloned from. Your colleagues would then just pull that branch, and it’s automatically created locally.
Note however that formally, the format is:
git push <remote-name> <local-branch-name>:<remote-branch-name>
But when you omit one, it assumes both branch names are the same. Having said this, as a word of caution, do not make the critical mistake of specifying only :<remote-branch-name> (with the colon), or the remote branch will be deleted!
So that a subsequent git pull will know what to do, you might instead want to use:
git push --set-upstream <remote-name> <local-branch-name>
As described below, the --set-upstream option sets up an upstream branch:
For every branch that is up to date or successfully pushed, add upstream (tracking) reference, used by argument-less git-pull(1) and other commands.
3.5 Git 分支 – 遠端分支
https://git-scm.com/book/zh-tw/v1/Git-%E5%88%86%E6%94%AF-%E9%81%A0%E7%AB%AF%E5%88%86%E6%94%AF
假設團隊有個地址為 git.ourcompany.com 的 Git 伺服器。如果從這裡 git clone,Git 會自動為你將此遠端倉庫命名為 origin,並下載其中所有的資料,建立一個指向它的 master 分支的指標,在本地命名為 origin/master,但你無法在本地更改其資料。接著,Git 建立一個屬於你自己的本地 master 分支,始於 origin 上 master 分支相同的位置,你可以就此開始工作。
把local branch 推送到某個命名不同的remote branch ,假設目前local branch 叫 “serverfix”,若想把遠端分支叫作 devbranch,可以用指令: git push origin serverfix:devbranch 來推送數據。
接下來,其他的協作者再次從伺服器上獲取資料時,他們將得到一個新的遠端分支 origin/serverfix,並指向伺服器上 serverfix 所指向的版本:
git fetch origin
透過 git checkout 指令從遠端分支 checkout 出來的本地分支,稱為 跟蹤分支 (tracking branch)。
git checkout devbranch
有了 branch 之後,要 git pull 變的比較麻煩,在 branch 裡 下 git pull
There is no tracking information for the current branch.
Please specify which branch you want to merge with.
See git-pull(1) for details.

git pull <remote> <branch>
會顯示沒東西可以 track.
改下:
git pull origin dev
傳回:
 * branch dev -> FETCH_HEAD
Already up-to-date.
結論:有了 branch 變成 git pull / git push 都會出錯,直接打錯的指令,git 會告訴我們正確指令是什麼。
第 1次 push/pull 失敗,打了正確的指令之後,就可以開始只打 git push/ git pull. 似乎有設定值因此被設定在 .git/config, 被「自動」修改過的 config 檔案:
[remote "origin"]
 url = ssh://[email protected]:9022/git/projects/MAC.git
 fetch = +refs/heads/*:refs/remotes/origin/*
[branch "master"]
 remote = origin
 merge = refs/heads/master
[branch "dev"]
 remote = origin
 merge = refs/heads/dev
git branch 使用方法:
NAME
git-branch – List, create, or delete branchesSYNOPSIS
git branch [–color[=<when>] | –no-color] [-r | -a]
[–list] [-v [–abbrev=<length> | –no-abbrev]]
[–column[=<options>] | –no-column]
[(–merged | –no-merged | –contains) [<commit>]] [–sort=<key>]
[–points-at <object>] [<pattern>…]
git branch [–set-upstream | –track | –no-track] [-l] [-f] <branchname> [<start-point>]
git branch (–set-upstream-to=<upstream> | -u <upstream>) [<branchname>]
git branch –unset-upstream [<branchname>]
git branch (-m | -M) [<oldbranch>] <newbranch>
git branch (-d | -D) [-r] <branchname>…
git branch –edit-description [<branchname>]
例如:
git remote 使用方法:
NAME
git-remote – Manage set of tracked repositoriesSYNOPSIS
git remote [-v | –verbose]
git remote add [-t <branch>] [-m <master>] [-f] [–[no-]tags] [–mirror=<fetch|push>] <name> <url>
git remote rename <old> <new>
git remote remove <name>
git remote set-head <name> (-a | –auto | -d | –delete | <branch>)
git remote set-branches [–add] <name> <branch>…
git remote get-url [–push] [–all] <name>
git remote set-url [–push] <name> <newurl> [<oldurl>]
git remote set-url –add [–push] <name> <newurl>
git remote set-url –delete [–push] <name> <url>
git remote [-v | –verbose] show [-n] <name>…
git remote prune [-n | –dry-run] <name>…
git remote [-v | –verbose] update [-p | –prune] [(<group> | <remote>)…]
例如: git remote -v show
如果 remote 只有一個repository, 就應該不太會用 remote 指令。
git push 使用方法:
NAME
git-push – Update remote refs along with associated objectsSYNOPSIS
git push [–all | –mirror | –tags] [–follow-tags] [–atomic] [-n | –dry-run] [–receive-pack=<git-receive-pack>]
[–repo=<repository>] [-f | –force] [-d | –delete] [–prune] [-v | –verbose]
[-u | –set-upstream] [–push-option=<string>]
[–[no-]signed|–sign=(true|false|if-asked)]
[–force-with-lease[=<refname>[:<expect>]]]
[–no-verify] [<repository> [<refspec>…]]


